How To Install Android 13 Beta On Your SmartPhone
Google is officially sending out the first Android 13 beta for qualified Pixel phones prior to Google I/O 2022, after releasing two developer previews. Here is how to install android 13 beta on your smartphone.

You may try out the upcoming Android 13 beta channel right now if you have a Pixel phone that is compatible. We’ve broken down the process for installing the first Android 13 beta on your Pixel phone in this article. By the end of 2022, Google plans to release the final version of Android 13. The company will release a beta update once a month till then. This is how to install Android 13 Beta on your smartphones that are eligible.
Table of Contents
Install Android 13 beta on Google Pixel latest Phones:
The Android 13 upgrade will be delivered straight from Google to the latest Pixel phones. Google is discontinuing maintenance for the Pixel 3a and 3a XL this time. The following is a comprehensive list of Android 13 Pixel devices that are supported:
- Google Pixel 4
- Google Pixel 4 XL
- Pixel 4a
- Google Pixel 4a (5G)
- Google Pixel 5
- Pixel 5a (5G)
- Google Pixel 6
- Google Pixel 6 Pro
- Pixel 6a (likely to launch with Android 13)

Using the Android Beta Program, install Android 13 Beta.
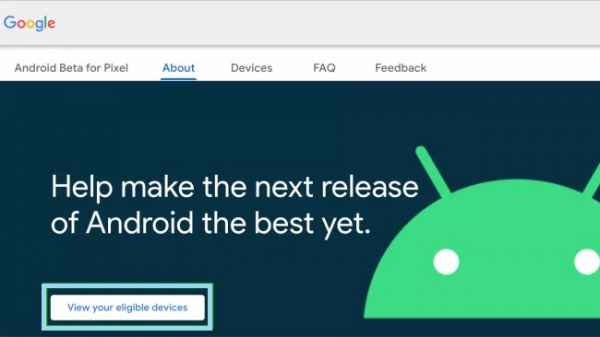
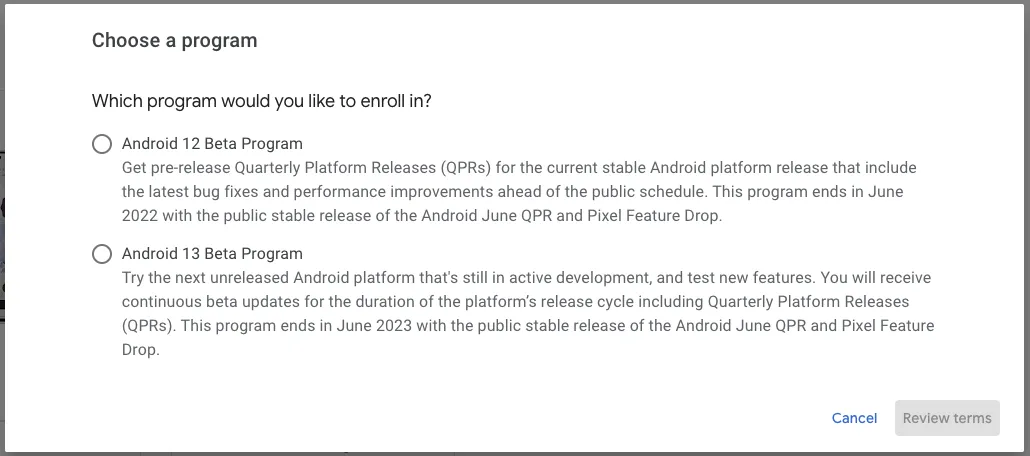
In contrast to the prerelease version builds for Android 13, Google provides an official OTA program for beta releases. You can then choose to join the beta program and receive new beta updates as soon as they are available. To join the Android 13 Beta OTA programme, follow the instructions below.
- Sign in with your Google account at Google’s Android 13 Beta program page. Under the “Devices” section, you’ll now get a list of all your eligible devices. To enroll in the Android 13 beta OTA update, click the “Opt-in” button below your device’s name. You can also leave the beta program at any time from this page.
- Wait a few minutes for the OTA to reach your Pixel phone after participating in the beta program. From Settings -> System -> System Update, you can manually check for updates.
- When the update is ready, download it and wait for it to finish installing. After the update, restart your Pixel phone to begin utilizing Android 13 beta.
OTA Image for Android 13 Beta
You can also manually install the OTA image instead of signing up for the official OTA if you prefer. It’s important to note that sideloading the OTA image will not wipe your phone. Additionally, you won’t need to unlock your bootloader to install the OTA image, making it an easy way to get the Android 13 beta.
Make sure you have ADB installed on your PC and USB debugging enabled on your phone by going to Settings -> Developer Options -> Enable USB Debugging. If Developer options aren’t visible, touch Settings -> About Phone -> Build number seven times to enable them.
- Google’s OTA downloads portal has the Android 13 beta OTA image for your Pixel phone. Place the downloaded image in the location where ADB is installed on your computer. To reboot to recovery mode, open a Command Prompt window in the ADB folder and type the following command:
- The “No command” screen with the Android logo will now appear. To fully enter recovery mode, press and hold the Power and Volume Up buttons for a few seconds, then release the Volume Up button followed by the Power button. When the phone returns to recovery mode, select “Apply Update from ADB.” You can use the volume buttons for moving up and down and the power button to make a selection in recovery mode.
- Use the ADB command on your PC to begin the installation procedure. The Android 13 beta OTA image you downloaded earlier is referred to as filename>. You might rename the zip file to “update” or “Android 13” for simplicity’s sake, though pasting the file name directly works perfectly as well. Choose “Reboot system immediately” to restart your Pixel after the installation process is complete. Your phone should now boot to Android 13 beta, and you can resume your previous activities.

Image Source: 9to5google
Using the Android Flash Tool to install Android 13 Beta
The Android Flash Tool is another way to install the Android 13 beta. To begin, go to Settings -> Developer Options and see if USB Debugging and OEM unlocking are available on your phone. After that, go to the instructions below:
- Connect your Pixel to your computer. You may need to download and install Google USB Drivers if you’re using Windows. Next, go to the Android Flash Tool website and select “Get Started.”
- A pop-up will appear, urging you to provide access to ADB keys. Authorize the USB debugging prompt from your Pixel phone by clicking “Allow ADB access.”
- To connect your Pixel phone to the Flash Tool, choose “Add new device.”
- A prompt will now show in the top-left corner of your browser. To connect your Pixel phone, choose it and click “Connect.”
- From the list of available builds, select “Android 13 Beta 1” as the targeted build. While the screenshot below does not display Android 13 Beta 1 because the device is already on Beta 1, you will see the Beta 1 listing on your end.
- Android Flash Tool wipes your phone and relocks your bootloader by default. You can change the settings by tapping the pencil icon next to the build number. Finally, to begin the setup process, select “Install build.”
- If all goes smoothly, the “Install Complete” message will appear. The build has been successfully installed. The Flash Tool displays the message “It is now safe to unplug your device.” Android 13 Beta should now be installed on your phone.

Install the Factory Image for Android 13 Beta.
You might also try installing Android 13 beta from a factory image. This solution is best for individuals who have an open bootloader on their Pixel device. After you’ve confirmed that USB debugging is enabled, follow the steps below to install Android 13 from a factory image:
- To begin, go to Google’s Factory Images distribution portal and download the factory image for your Pixel. In the ADB installation location, extract the downloaded zip file. By default, the setup script destroys data, but you can select to keep it. Using a text editor, remove the “-w” flag from the flash-all.sh or flash-all.bat (Windows) file.
- To restart too fast boot mode, open a Command Prompt window in the ADB installation folder and type the following command.
- To begin installing the Android 13 factory image, double-click ‘flash-all.bat’ on Windows or use the command ‘flash-all’ on macOS or Linux. Your phone will boot into Android 13 beta after the download procedure is completed.
This concludes how to install Android 13 on your smartphone. If you encounter any problems or bottlenecks throughout the setup process, please let us know in the comments and we will do our best to assist you. If you don’t have a Pixel phone that supports Android 13, check out our Android 13 article to learn about all of the new features Google has planned for this version of Android.
Also Checkout: How To Easily Add Friends On Steam


