How To Record A Microsoft Teams Meeting
How to Record a Microsoft Teams Meeting? Here’s our guide for you.
Microsoft Teams is a digital collaborative workspace within Microsoft Office 365 that allows communication platforms for a company, institute, or class. The app earned serious value for business & team management in the last 2-years during the pandemic covering online meetings, managing work schedules, sharing data, tracking deadlines, and employees all in a single virtual workspace.
However, although it seems simple to use this platform, people often face serious confusion when utilizing the full potential of its features, and recording a meeting on Microsoft Teams is one of them. Here we break ‘how to record a meeting in Microsoft Teams one step at a time:
The work-from-home situation is rather comfortable unless you face a gradual communication gap in your workspace which is very evident with the online mode of communication. Microsoft Teams minimizes that gap with a simple and smooth interface however it’s very human to miss important points in a live video conference.
Microsoft Teams enables a feature to record your meeting so that you can review a live meeting or conference even after it is over. As the ‘record meeting’ feature comes free with the Microsoft Teams app, it’s handy and user-friendly to use but only when you know how and when you can record a meeting.
Table of Contents
The following article will guide you through the steps and conditions to record a Microsoft Teams Meeting with ease-
1. Who can record a meeting?
Microsoft Teams allows every meeting to be recorded but not everyone has access to record a meeting right away. Very first, the ‘meeting recordings’ must need to be enabled by the IT admin of the team. The meeting organizer has both the control to start or restrict a recording.
The participants from the same company or organization can also record a meeting. Microsoft Teams fully restricts the guest participants who don’t belong to the company or organization from recording a meeting.
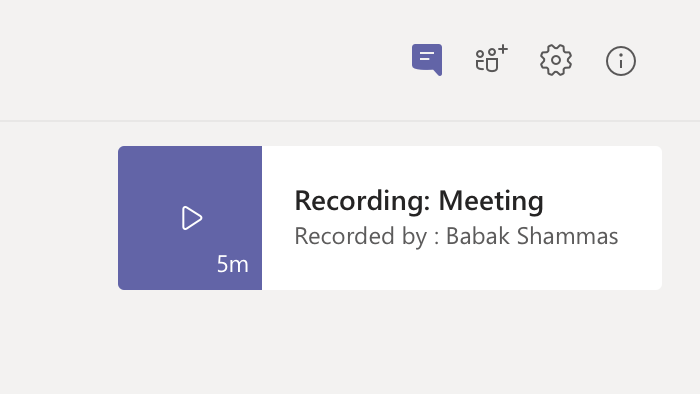
However, using it with Office 365 Enterprise, guests issued with E1, E3, and E5 licenses allow non-organizers to start or stop a meeting recording.
Although the recording of a meeting is specific to admins and the people from the same organization, there is an additional feature to save the recordings in OneDrive and SharePoint, so that the recording can be downloaded and shared both with the outside guests and within the organization.
2. How to start recording?
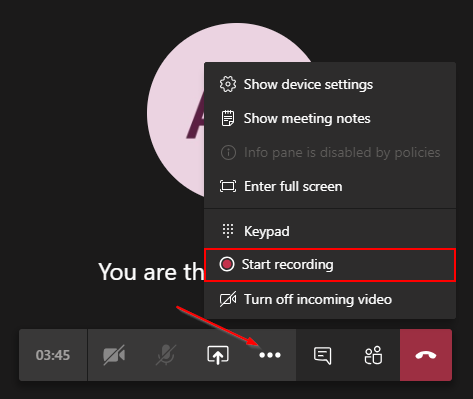
As soon as you join or start (in case you are the organizer) a meeting, you will have a “… more options” menu at the top right-hand side. Click on the “… more options” menu and there pops up a long list of options. You can find the ‘Start recording’ option down the list. Click on that once the meeting is good to go and everyone who joined in will receive a notification of the meeting being recorded.
A meeting recording will ensure all the activities on the screen are recorded including video, audio, and screen-sharing activities for everyone in the meeting.
To be mentioned, once a meeting recording is started, only one of the participants can record the meeting. In case if the person recording the meeting leaves in the middle, the meeting will keep recording until the last member leaves the meeting.
Also Checkout: How to use Spotify on Apple Watch (The Best & Easiest Way)
3. How to stop recording?
Once the meeting is over, you can again navigate to the “… more options” and find the “Stop recording” option at the same point to terminate the recording process. In case a person forgets to stop recording, the meeting will automatically end after four hours.
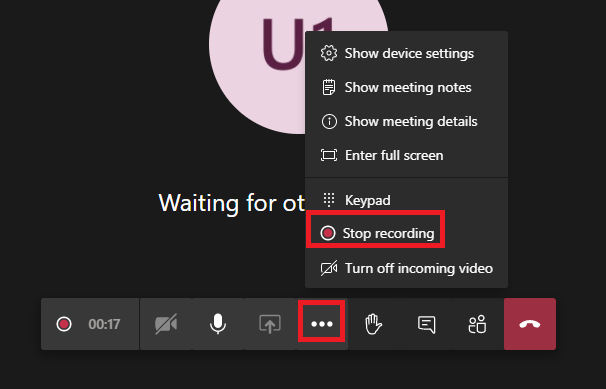
As soon as you click on the “Stop recording” option, the meeting will instantly start getting saved to OneDrive or SharePoint. The saving of recording in either of the safes can be distinguished by the mode of meeting. If it is a channel meeting it will process and get saved with SharePoint while any other mode of the meeting will get saved with OneDrive.
4. Find the recordings.
As it seems very easy to find your recordings, it’s not that simple to locate them in one go. After successfully saving the meeting recordings as we mentioned above, you can find the recording in SharePoint or OneDrive depending on the type of meeting. The channel meeting will be saved with SharePoint. All other types of meetings can be found in OneDrive.
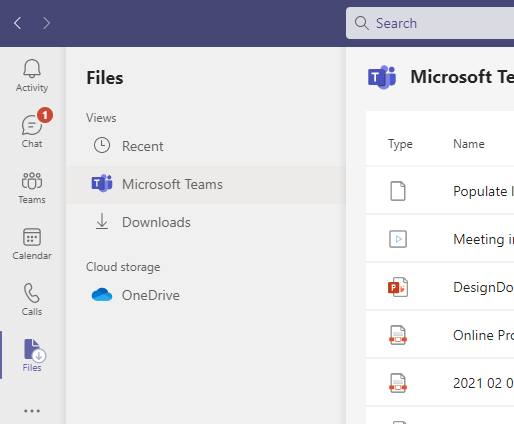
Microsoft Teams sends a link to the recording with an email confirmation to the meeting organizer in their particular chat or channel. You can also find the ‘More actions’ followed by the ‘More Options’ button and can go to either SharePoint or OneDrive to download or preview your meeting recording.
5. Share the recording.
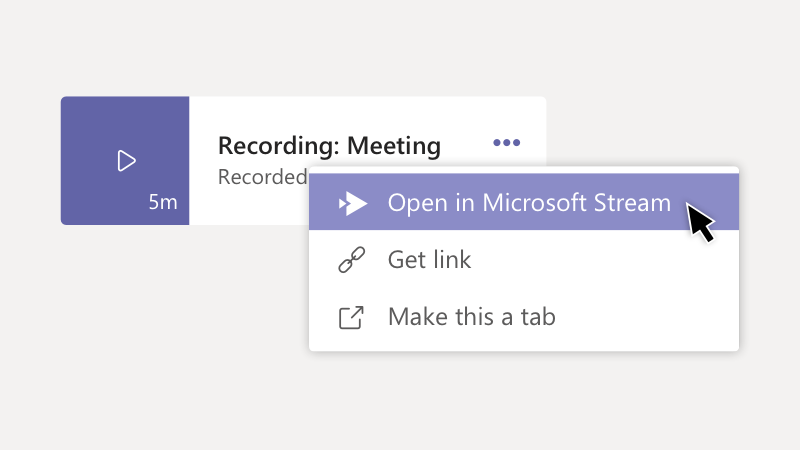
As the meeting can’t be recorded by guest members attending the meeting, the meeting organizer can always share the recordings among or outside the organization.
Both SharePoint and OneDrive have the “Share” link in the top left corner of the screen, once you click the link, you have to add the details of the person you are going to share the recordings with and you are good to go. The meeting organizer can “Delete” the recording anytime with just one click on the delete option.
Also Checkout: How to Stream Netflix on Discord with Friends to Watch TV Shows and Movies
6. Recording expiration
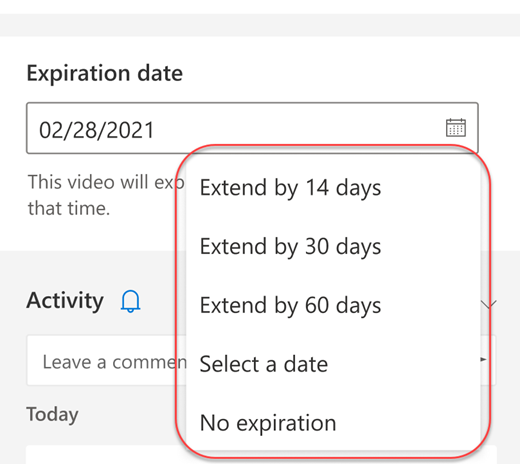
Microsoft Teams have this feature in case of regular piling up of large meeting recordings or privacy threats to confidential meetings. You can automate the deletion of your recordings by setting up an ‘expiration date’.
In case of an already enabled expiration date, you will receive a notification as soon as the meeting ends to inform you about the expiration date of that particular recording. You can always change the expiration date of the recording after a meeting by finding the recording files and clicking on the “Details” option you can find a menu to adapt the expiration date in SharePoint or OneDrive. You can also choose the recordings to don’t have an expiration date.
Among the highly packed features of working on Microsoft Teams, these are the key steps to set up a “meeting recording” within Microsoft Teams. We hope this read brings ease to your daily work experiences.
Also Checkout: 7 Best Procreate Alternatives
